
Checklist for Mobile Accessibility Testing
Step-by-step mobile accessibility checklist covering WCAG AA, VoiceOver/TalkBack testing, manual and automated checks, and prioritizing fixes.
Mobile apps must be accessible to everyone, including users with disabilities. Here's why: inaccessible apps can exclude millions, harm your brand, and even lead to legal penalties under regulations like the ADA in the U.S. or the European Accessibility Act (effective June 2025). Accessibility isn't just about compliance - it's about usability for all.
This guide provides a step-by-step checklist for testing mobile app accessibility. Whether you're a developer or designer, you'll learn how to identify and fix issues early, saving time and resources. Key takeaways include:
- Follow WCAG 2.1/2.2 standards: Focus on principles like Perceivable, Operable, Understandable, and Robust.
- Test on real devices: Tools like VoiceOver (iOS) and TalkBack (Android) are essential.
- Manual testing matters: Automated tools catch only 40% of issues.
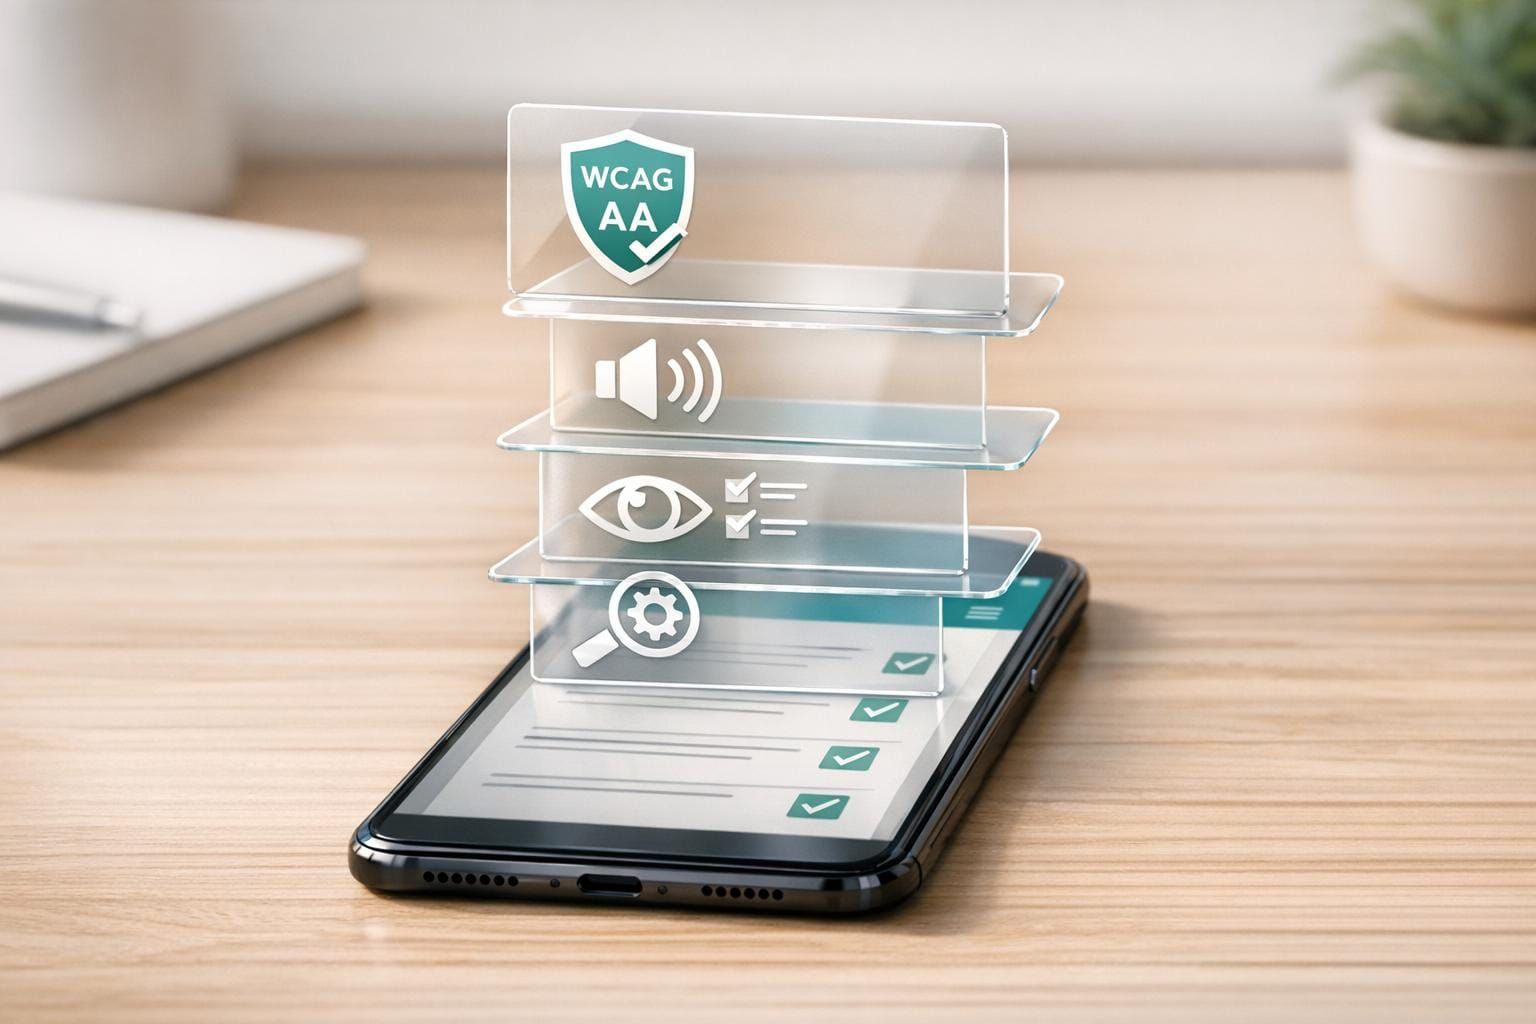
- Legal compliance: Aim for WCAG Level AA to meet ADA, EAA, and other requirements.
Accessibility benefits everyone, from users with disabilities to those in situational challenges (e.g., bright sunlight or a broken arm). Start testing now to ensure your app works for all users.
Accessibility Standards for Mobile Apps
WCAG Compliance Levels for Mobile Accessibility: A, AA, and AAA Standards Comparison
Mobile accessibility standards establish criteria to ensure apps are usable by everyone. At their core are the Web Content Accessibility Guidelines (WCAG) 2.1 and 2.2, which are built around four key principles: Perceivable, Operable, Understandable, and Robust. These guidelines adapt to the unique challenges of mobile devices, addressing features like touch gestures, device orientation, and motion controls. Together, they provide a framework for both technical compliance and thoughtful design.
Legal regulations also play a significant role. Laws such as the Americans with Disabilities Act (ADA) in the United States, the Accessibility for Ontarians with Disabilities Act (AODA) in Canada, and the European Accessibility Act (EAA) require mobile apps to meet accessibility standards. Additionally, platform-specific guidance adds another layer of direction. For instance, Apple’s Human Interface Guidelines highlight features like VoiceOver and Dynamic Type, while Google’s Material Design emphasizes tools like TalkBack and proper touch target sizing.
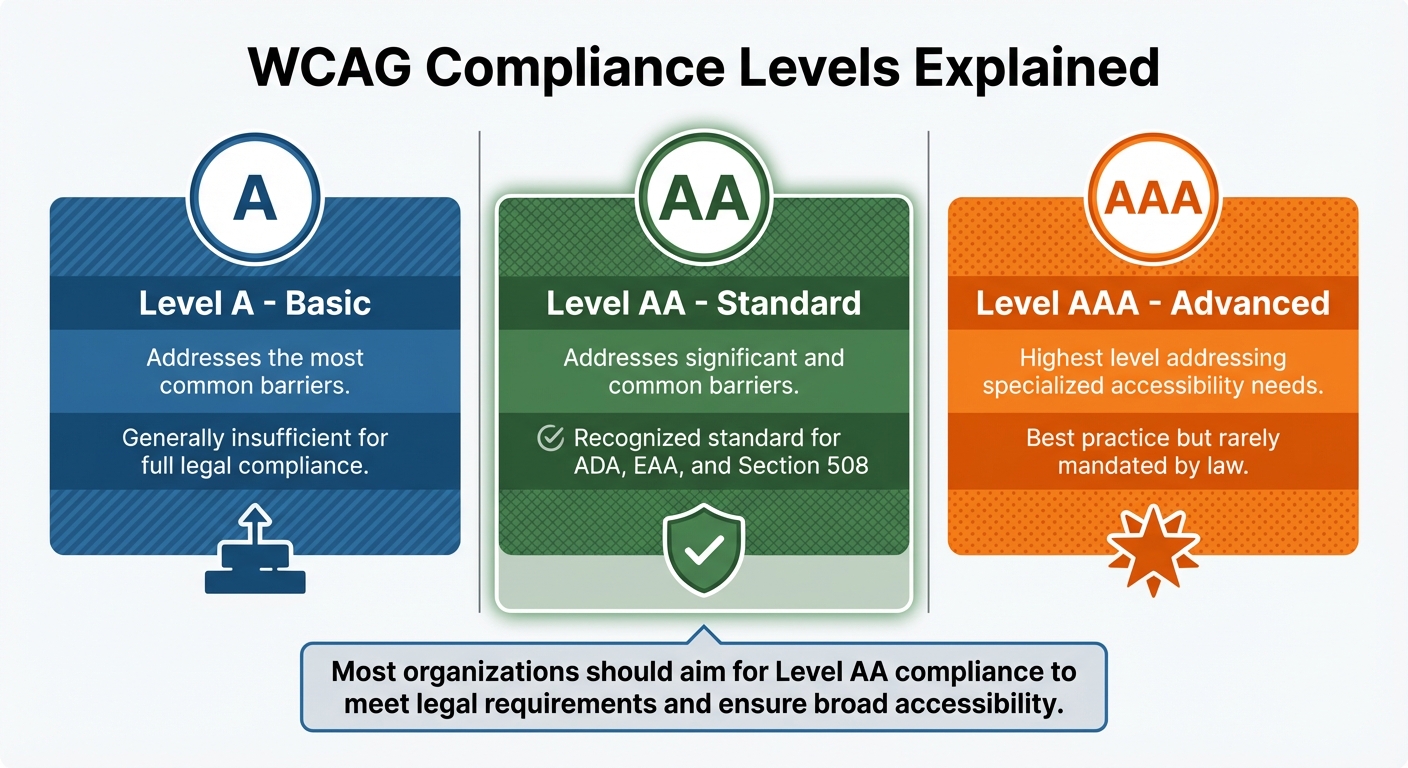
Compliance Levels Explained
WCAG outlines three levels of compliance, each with varying degrees of accessibility:
- Level A: Covers basic accessibility features, but it’s generally not enough for meeting legal requirements.
- Level AA: The most widely accepted standard, addressing significant barriers without overly restrictive demands. Regulations like ADA, Section 508, and the EAA reference this level.
- Level AAA: The highest standard, designed for specialized accessibility needs. However, achieving this level universally is often impractical and is rarely required by law.
| Compliance Level | Description | Regulatory Status |
|---|---|---|
| Level A | Basic level addressing the most common barriers. | Generally insufficient for full legal compliance. |
| Level AA | Addresses significant and common barriers. | Recognized standard for ADA, EAA, and Section 508. |
| Level AAA | Highest level addressing specialized accessibility needs. | Considered best practice but rarely mandated by law. |
Now, let’s dive into how these standards shape specific app features.
How Standards Apply to App Features
Accessibility standards translate into practical requirements that address diverse user needs:
- Visual: Text must have a contrast ratio of at least 4.5:1 for normal text and 3:1 for larger text. Apps should also allow text scaling up to 200% without disrupting layout. Both iOS and Android support scalable text features.
- Motor: Touch targets must meet minimum size requirements - 44×44 points for iOS and 48×48 dp for Android, roughly equivalent to 9 mm. Complex gestures should be supplemented with simpler, single-tap alternatives.
- Auditory: Provide visual alternatives for audio content, such as closed captions, transcripts, or haptic feedback for notifications.
- Cognitive: Simplify the user experience with consistent layouts, clear hierarchies, and straightforward language to reduce mental effort.
Both iOS and Android recommend using their native components (UIKit/SwiftUI for iOS and Material Components for Android). These built-in tools come with accessibility features that help assistive technologies identify roles, states, and interactions effectively.
Preparing for Testing
Before diving into testing, it’s essential to have a solid plan and a well-prepared setup. Skipping this step increases the chances of overlooking critical accessibility issues.
Building Your Test Plan
A good test plan starts with platform and device coverage. Since iOS and Android each have their own unique accessibility features - like VoiceOver for iOS and TalkBack for Android - it’s important to test on both platforms. Always use real devices for testing, as emulators often fail to capture hardware-specific behaviors.
Make a list of assistive technologies to include in your testing, such as screen readers, switch controls, voice access, and external Bluetooth keyboards. Establish clear pass/fail criteria that align with WCAG AA standards.
"Automated testing reveals only a fraction of the issues and is perfect for regular accessibility hygiene. However, to get the full picture, you need to test manually." - Abra
Approach testing screen by screen instead of randomly jumping around. This method ensures that every element - like buttons, labels, and states - and every user flow, such as login or checkout, gets thoroughly examined. While automated tools are great for initial scans, manual testing is essential for evaluating more complex interactions.
Once your plan is ready, set up your devices in a controlled testing environment.
Setting Up Your Testing Environment
Start by resetting your test devices to their default settings - standard font size, unlocked screen orientation, and no active accessibility features. This creates a clean baseline. Then, enable the specific accessibility features you’ll be testing, one at a time. Testing features individually helps avoid overlapping issues that could complicate your results.
Here’s a quick reference table for setting up iOS and Android environments:
| Component | iOS Environment Setup | Android Environment Setup |
|---|---|---|
| Screen Reader | VoiceOver (Settings > Accessibility) | TalkBack (Settings > Accessibility) |
| Visual Testing | Dynamic Type, Accessibility Inspector | Font Scaling, Accessibility Scanner |
| Motor Testing | Switch Control, Voice Control | Switch Access, Voice Access |
| Target Size | 44×44 pixels minimum | 48×48 dp (approx. 9mm) minimum |
| Orientation | Portrait & Landscape | Portrait & Landscape |
Test system-level features like Reduce Motion and Dark Mode individually to ensure your app respects OS-level preferences. Evaluate every screen in both portrait and landscape orientations to confirm content remains accessible and functional. For motor accessibility testing on Android, you can configure the physical volume buttons to act as switches for navigation with Switch Access.
Leverage native tools like the iOS Accessibility Inspector and Android Accessibility Scanner. These tools help you quickly identify issues like missing labels or touch targets that are too small. By setting up your environment properly, you’ll be better equipped to spot accessibility gaps and address them effectively. These tools also provide overlays and metadata insights that make it easier to catch surface-level problems before moving on to manual testing.
Running Accessibility Tests
With your testing environment set up, it’s time to dive into the actual testing process. A thorough accessibility audit combines manual testing, automated scans, and real user feedback. Each method brings a unique perspective, helping you catch a wide range of issues.
Manual Testing Methods
Manual testing is essential for spotting issues that automated scans often miss. For instance, around 25% of digital accessibility problems are tied to inadequate keyboard support. By manually testing, you can ensure focus order is logical and button labels are appropriately descriptive.
Start by using a screen reader like VoiceOver (iOS) or TalkBack (Android). As you navigate your app, listen closely to the announcements. Every interactive element - whether it’s a button, link, or form field - should clearly state its role (e.g., "Submit button") and its current state (like "checked" or "unchecked").
Next, check touch targets. Make sure tappable elements meet the minimum size requirements: 44×44 pt for iOS and 48×48 dp for Android. There should also be enough spacing between elements to avoid accidental taps. Test text scaling by increasing the system font size to 200% - the layout should adjust smoothly without clipping text, overlapping elements, or forcing horizontal scrolling.
For keyboard accessibility, connect an external Bluetooth keyboard. Use Tab, Shift+Tab, and Space/Enter to verify that focus moves logically and elements activate as expected. For actions requiring complex gestures (like swiping or pinching), ensure there’s a simple tap-based alternative.
Color and contrast are equally important. Verify your app meets WCAG AA contrast ratios: 4.5:1 for regular text and 3:1 for larger text. Ensure color isn’t the only way information is conveyed - underline links or use other visual indicators. Finally, test the app in both portrait and landscape modes to confirm accessibility across orientations.
Automated Testing Tools
Automated tools are excellent for spotting technical issues like missing labels, low contrast, and improperly sized touch targets. However, they only catch about 40% of accessibility problems, as they can’t evaluate the logic behind things like focus order or alternative text. That’s why automated scans should always be paired with manual testing.
For quick checks during development, try native tools like Google Accessibility Scanner (Android) or Apple’s Accessibility Inspector (iOS). For more comprehensive scans, platforms like BrowserStack App Accessibility Testing and Axe DevTools Mobile integrate with your CI/CD pipeline and work on real devices. Tools like WAVE and Google Lighthouse are also effective for identifying issues like low contrast or missing labels. Combining these tools with manual testing ensures both technical accuracy and contextual usability.
Testing with Real Users
No accessibility audit is complete without input from real users who rely on assistive technologies. Their experiences often reveal challenges that automated tools or expert reviews can miss.
Recruit participants through specialized services or local organizations like the National Federation of the Blind. In-person testing allows you to observe gestures, device handling, and body language, while remote testing lets users work with their own devices and settings.
Plan for an extra 30 minutes to accommodate setup and navigation. Since screen reader users can’t "think aloud" while listening to audio, give them time to process before asking for feedback. Use neutral prompts like "I understand" instead of nodding, and avoid visual language - replace phrases like "see" or "look at" with "find" or "come across." Encourage participants to use their preferred screen reader speed to ensure the process feels natural.
Testing with real users adds a layer of authenticity to your audit, helping you identify barriers that might otherwise remain hidden.
Mobile Accessibility Checklist
Here's a handy checklist to ensure your mobile app meets key accessibility testing standards.
Visual Accessibility
- Color contrast: Ensure normal text has a minimum contrast ratio of 4.5:1, while large text (18-point or 14-point bold) requires 3:1.
- Verify readability in both light and dark modes.
- Avoid relying solely on color to convey information. For example, underline links or use icons and text labels for error states.
- Add descriptive alternative text for all images, icons, or graphics unless they’re purely decorative.
- Confirm text can scale up to 200% without causing clipping, overlapping, or horizontal scrolling.
- Ensure every interactive element has a visible focus indicator (like an outline or glow) and follows a logical focus order.
- Use a consistent heading structure (H1, H2, H3) and ARIA landmarks to assist screen reader navigation.
Next, check for motor accessibility compliance.
Motor Accessibility
- Ensure touch targets meet minimum size requirements: 44×44 pixels for iOS and 48×48 dp for Android (about 9mm).
- Maintain at least 8-pixel spacing between interactive elements.
- Use CSS padding to expand tap areas for small icons without altering their visual appearance.
- Offer single-tap alternatives for gesture-based actions, like a "Delete" button for swipe-to-delete features.
- Use pointer cancellation to trigger actions on the "up-event" rather than the "down-event."
- Support external input devices, such as keyboards and switch controls.
- Allow users to disable or replace motion-triggered actions with button-based options.
- Shift accessibility focus to modals when they open and return it to the original trigger point when the modal is closed.
After this, address auditory accessibility needs.
Auditory Accessibility
- Add synchronized captions for all video content, whether prerecorded or live.
- Provide complete text transcripts for audio-only content, like podcasts or voice messages.
- Pair critical notifications with visual cues (e.g., on-screen text or flashing) or haptic feedback (like vibrations).
- Ensure alerts remain noticeable even in Silent or Vibrate mode.
- Include pause, stop, or mute controls for audio that plays automatically for more than three seconds.
- Offer separate volume controls for background music, ambient sounds, and narrative speech.
- Make sure background audio automatically lowers or pauses when a screen reader is active.
Finally, review the general user interface for accessibility.
General UI Accessibility
- Verify full keyboard navigation using keys like Tab, Shift+Tab, and Space/Enter.
- Support both portrait and landscape orientations unless a specific orientation is essential for functionality.
- Maintain consistent navigation patterns throughout the app.
- Use the
hiddenattribute ordisplay: noneto hide content from screen readers, avoiding methods like zero opacity or z-index adjustments. - Respect system-level accessibility settings, such as "Closed Captions" on iOS or "Live Caption" on Android.
Fixing and Retesting Issues
Once accessibility issues have been identified, the next step is addressing them and confirming they’ve been resolved effectively.
Prioritizing Fixes
The first step is to assess the user impact. Focus on issues that disrupt essential tasks, such as logging in, completing purchases, or submitting forms. For example, a "Sign In" button that doesn’t work with screen readers is far more urgent than a slightly low-contrast label on a settings page.
Organize problems by severity - Critical (complete blockers), High (major obstacles), Medium, and Low. This structure allows your team to tackle the most pressing issues first. When possible, group similar problems together. For instance, if all buttons lack proper touch target sizes, you can apply a universal fix instead of addressing each button individually.
Document each issue clearly. Use short, descriptive titles, include screenshots, and outline steps to reproduce the problem. Reference specific accessibility guidelines, like "WCAG 2.2 Level AA 1.4.3 Contrast (Minimum)." Track these issues in your standard issue tracker, and make sure they’re part of your sprint’s "definition of done" so they don’t fall through the cracks.
Once fixes are prioritized and documented, it’s time to retest every change thoroughly.
Retesting After Fixes
After fixing the issues, it’s essential to verify that the solutions work across all platforms. This step ensures the accessibility of your app remains consistent and reliable.
Before sending fixes to QA, use tools such as the iOS Accessibility Inspector or Android Accessibility Scanner to confirm resolutions. This early self-check helps catch obvious problems, saving time in the long run.
When retesting, focus on one screen and one assistive technology at a time. This approach prevents confusion between unrelated issues. Always test on actual iOS and Android devices instead of emulators to capture real-world behavior. Reset devices to their baseline settings before starting tests.
It’s also crucial to ensure that fixes for one group of users don’t unintentionally create barriers for others. For instance, increasing touch target sizes shouldn’t disrupt the visual layout or affect the reading order. Automated tools can help catch smaller issues, like missing labels or low-level regressions, immediately after deployment. For more complex interactions - like modals, gesture alternatives, or focus management - manual testing is essential to ensure everything works smoothly.
Documentation and Maintenance
Clear documentation turns accessibility testing into a consistent, ongoing effort rather than a one-time task. Without proper records, teams can lose track of what’s been tested, fixed, or still needs attention. Keeping everything organized not only supports current development but also simplifies future updates and audits.
Recording Test Results
Every accessibility issue should be documented thoroughly. Start by describing the issue: what’s broken, where it’s located, and the specific screen, component, or element ID involved. Include the relevant WCAG success criterion it violates (e.g., "1.4.3 Contrast Minimum") alongside details like the device model, operating system version, and assistive technology used (such as VoiceOver on iOS or TalkBack on Android).
Visual aids like screenshots or video recordings can speed up the developer’s understanding of the issue and serve as evidence for audits. Include clear remediation steps and assign a severity level (Critical, High, Medium, or Low) to help prioritize fixes effectively.
Use your team’s project management tools, like Jira, to track these issues. Make accessibility a standard part of your "Definition of Done" for every sprint. While tools like BrowserStack's Spectra can flag many WCAG violations, manual checks for things like focus order, reading sequences, and gesture alternatives remain essential.
Maintaining Accessibility Over Time
After documenting issues, it’s crucial to keep your dashboard and testing processes updated. Accessibility isn’t a one-and-done task - it requires continuous attention as your app evolves. New features can introduce unexpected barriers, so integrating accessibility testing into your CI/CD pipeline is essential to catch regressions with every build. Semi-automated testing workflows can cut down the time spent on documentation by as much as 90%, helping maintain accurate records for compliance.
Testing on actual iOS and Android devices - rather than emulators - provides a more accurate picture of OS-specific behaviors. Use a centralized dashboard to track compliance across app versions and platforms, and document whether your app respects OS-level accessibility settings like "Reduce Motion" or "Dark Mode." Save automated scan results locally to build a historical record for audits, and export these results into your existing reporting systems.
"Accessibility testing isn't about compliance. It's about creating usable, equitable digital experiences for everyone." - QABrains
Think of your accessibility checklist as a living document that grows with new UI patterns and standards. Regular regression testing ensures that past fixes remain effective and that new updates don’t introduce fresh barriers.
Conclusion
Mobile accessibility testing is about ensuring apps are usable for over 1.3 billion people with disabilities. It’s not just about ticking boxes - it’s about creating an inclusive experience. By weaving accessibility into the development process, testing on actual devices (like VoiceOver or TalkBack), and combining automated tools with manual reviews, you can craft apps that work for everyone.
Meeting standards like ADA, Section 508, or European regulations is only part of the story. Designing with accessibility in mind - using proper contrast, touch targets of at least 44×44 pixels, and logical screen reader navigation - benefits all users. Features such as text scaling and high contrast don’t just help those with permanent disabilities; they also support users facing temporary or situational challenges, like navigating in bright sunlight or dealing with an injury. This checklist provides a roadmap for embedding these principles into your app.
Make accessibility a part of your Definition of Done. Testing early in the design phase can save time and money by avoiding expensive fixes later. Automated tools are great for catching straightforward issues, like missing labels or poor color contrast, but manual testing is crucial for verifying focus order, gesture alternatives, and how dynamic content is announced. To truly understand how your app performs, involve real users with disabilities during testing - automated tools can only go so far in replicating their experiences.
"Mobile accessibility isn't a nice-to-have - it's essential. It improves your product's usability, reach, and legal compliance." - A11y Pros
FAQs
What’s the fastest way to start mobile accessibility testing?
The fastest way to get started with mobile accessibility testing is by using automated tools. These tools are easy to set up and can quickly identify common accessibility issues, providing instant feedback. While they save time, they shouldn't be the only method you rely on.
For a more complete evaluation, pair automated scans with manual testing. This includes checking how well your app works with screen readers, ensuring touch targets are appropriately sized, and verifying that color contrast meets accessibility standards. Combining these methods gives you a balanced and efficient way to assess accessibility.
How do I test VoiceOver and TalkBack on real devices?
To test VoiceOver on iOS, start by enabling it through Settings > Accessibility > VoiceOver. Once activated, you can navigate using gestures like swiping right or left to move between elements and double-tapping to select or activate them.
For TalkBack on Android, enable it by going to Settings > Accessibility > TalkBack. Similar to VoiceOver, you can navigate with swipe gestures, double-tap to activate items, and use features like two-finger scrolling for smoother interaction.
Always test on real devices instead of emulators. This approach provides a more accurate representation of how these assistive technologies function in real-world scenarios.
Which accessibility issues should I fix first?
To tackle key obstacles that hinder users from effectively navigating and interacting with the app, prioritize the following steps:
- Label elements for screen readers: Make sure all interactive components are clearly labeled to support screen reader functionality.
- Enhance color contrast: Align with WCAG 2.2 AA standards to improve visibility for users with visual impairments.
- Adjust touch target sizes: Ensure buttons and interactive areas are large enough to avoid accidental taps.
By addressing these core issues first, you’ll create a more inclusive and user-friendly experience for a broader audience.