How to Prepare for Remote User Interviews
Prep determines success: set a clear goal, build a tight script, secure tools and consent, and test your setup before every remote interview.

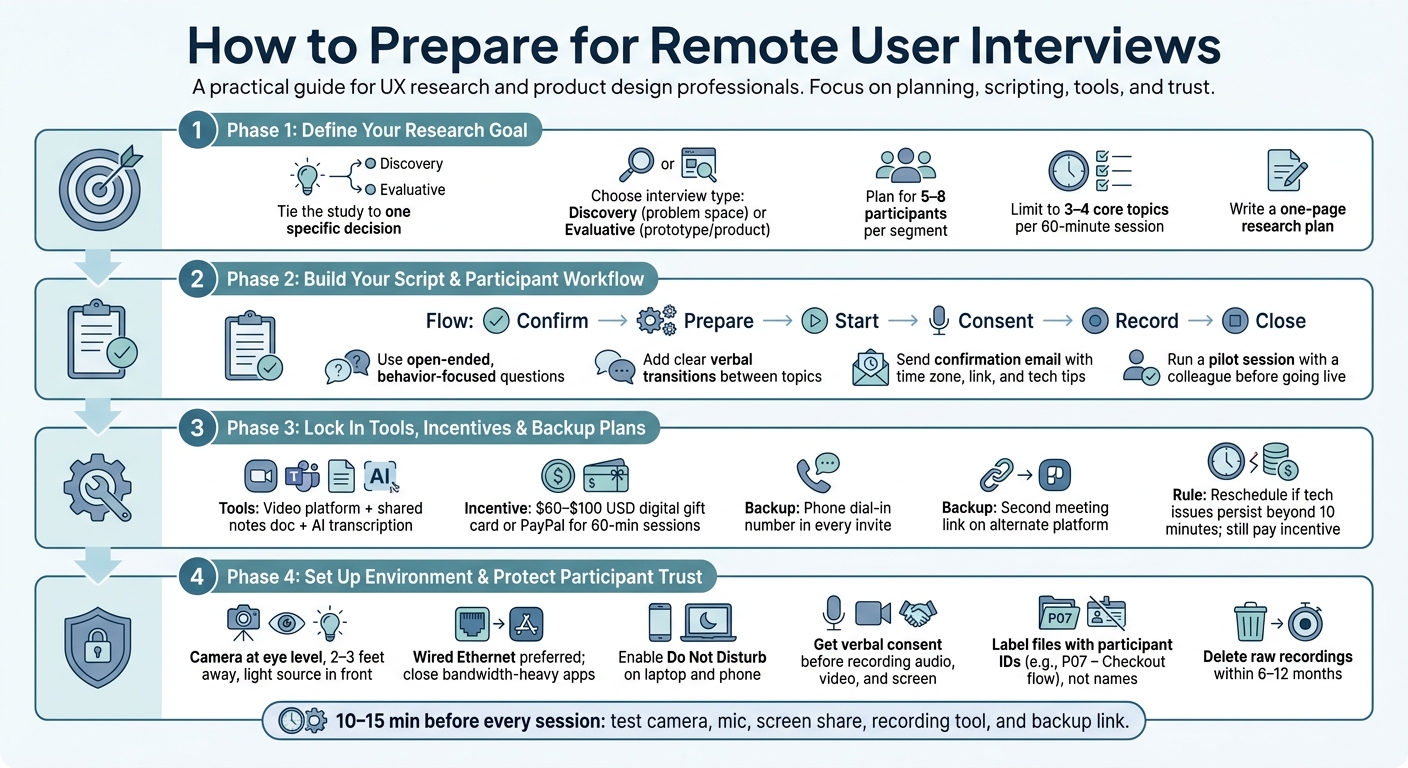
A remote interview usually goes well or badly before the call starts. From what I see in this guide, the prep comes down to 4 things: set a clear research goal, build a short script, lock in tools and backup options, and handle consent and setup before recording.
If I wanted the short version, it would be this:
- Decide what I need to learn before I recruit anyone
- Use a semi-structured 1:1 format and keep sessions around 60 minutes
- Plan for 5–8 people per segment to spot repeated patterns
- Write open-ended questions with clear topic changes
- Confirm consent, recording, and incentive details up front
- Offer a backup plan for Wi-Fi, audio, or link failures
- Test my room, mic, camera, and screen share 10–15 minutes before the call
- Store files safely and use participant IDs instead of names
A few numbers stand out. The guide suggests limiting the main discussion to 3–4 topics in a 60-minute session, using a $60–$100 incentive range for many hour-long interviews, and setting a rule like reschedule after 10 minutes if tech issues block the session.
Here’s the core idea in one view:
| Area | What I’d do |
|---|---|
| Research plan | Tie the study to one decision, define participant behavior, set success rules |
| Interview guide | Use warm-up questions, open-ended prompts, and plain transitions |
| Tools and backup | Pick one video tool, shared notes, recording, dial-in, and a second link |
| Trust and setup | Get verbal consent, test tech, reduce distractions, protect files |
So this isn’t just about having questions ready. It’s about making sure the session stays focused, usable, and respectful from invite to follow-up.
How to Prepare for Remote User Interviews: A Step-by-Step Checklist
1. Define your research goal and interview plan
Before you recruit anyone, get clear on what you need to learn. If the team skips that step, interviews tend to produce a lot of conversation but very little direction.
Set clear objectives and pick the right interview type
Start by deciding whether you need discovery interviews or evaluative interviews.
| Interview Type | When to Use It | What You're Looking For |
|---|---|---|
| Discovery | You understand the problem space but not the solution | Workflows, pain points, mental models, unmet needs |
| Evaluative | You have a concept, prototype, or live product to test | Task friction, usability issues, design validation |
If the problem is still fuzzy, do discovery first.
Then turn that choice into a few specific objectives. A simple format works well: By the end of this study, we want to understand [decision]. For example: which parts of onboarding to simplify or remove.
Choose the session format, length, and success criteria
Use moderated one-on-one sessions, and keep them semi-structured. That gives you a plan, but it also gives you room to follow an unexpected comment when it leads somewhere useful.
A 60-minute session usually leaves about 40 minutes for the main discussion, so plan for only 3–4 topics max.
Once the format and timing are set, define what a useful result looks like. Don’t treat “we ran eight sessions” as the win. Tie success to evidence.
For a discovery study, that could mean finding at least 3 recurring pain points that show up in more than half of sessions. For an evaluative study, it might mean the new flow can be completed without prompting by at least 70% of participants. That level of detail keeps everyone honest about what the research did - and did not - show.
Write a one-page research plan to align your team
Put all of this into a one-page research plan. Include your objectives, target participant criteria, method, session length, note-taking approach, and what evidence counts as a useful outcome.
When you define participants, focus on behavior instead of job title. SaaS product managers who have launched at least one feature in the last 6 months is much more useful than just product managers. For qualitative remote interviews, plan for 5–8 participants per key segment. That’s usually the point where major patterns start to repeat. If you’re studying two separate groups, like admins and end users, aim for 5–8 per segment if your timeline allows.
It also helps to name the risks early. Low recruitment, tech issues, and time zone conflicts are all predictable problems. If you note them in the plan - along with how you’ll handle them - you’re far less likely to end up scrambling at the last minute. Share the plan before recruiting so researchers, designers, and stakeholders are aligned on scope.
sbb-itb-124fdbf
2. Build a script and participant workflow for remote sessions
Once your research plan is set, turn it into materials you can use live on the call: a discussion guide, an opening script, and a clear participant workflow. That workflow should move in a simple order: confirm, prepare, start, consent, record, close. The point is to have a guide that helps you in the moment, not a script you read line by line.
Write a discussion guide with open-ended questions and clear transitions
Your discussion guide shouldn't feel stiff. Start with the main research questions and assumptions from your one-page plan, then turn each one into 2–3 interview questions or tasks that fit inside a 45- to 60-minute session. Keep it lean so there's space for follow-up.
A simple flow works well:
- brief introduction
- warm-up
- 3–4 core topics or tasks
- short wrap-up
Warm-up questions should feel easy and familiar. For example, ask participants to describe a typical day in their role. If you're running a task-based or usability session, add task prompts and let participants share their screen.
For the core part, use open-ended questions that focus on behavior. Instead of asking whether something is useful, ask participants to walk you through the last time they tried to do a task. Then follow with neutral probes like What made you do it that way? or What made you decide to do it that way? Stay away from jargon, double-barreled questions, and wording that hints at a "right" answer.
Transitions matter a lot in remote sessions. Over video, people can lose the thread fast. When you switch topics or move to a prototype, say it plainly. Add those transition lines to your guide so the conversation feels smooth and your note-taker can sort observations by section.
Next, define what participants will hear before, during, and after the call.
Write the opening, consent, recording, and closing script
Start by introducing yourself. Then explain the purpose, length, and format of the session, and make it clear there are no right or wrong answers. Let participants know they can skip any question or stop the session at any time.
Before recording, ask for clear verbal consent to record audio, video, screen sharing, and chat. Wait for an actual yes before you begin. Explain who will have access to the recording, how long you'll keep it, and that anything shown on screen may be captured as part of the research record.
If you're offering an incentive, be exact about what it is and when participants will get it. For example, say they'll receive a $75 digital gift card within 3 business days after the session.
Your closing script should thank the participant, stop the recording, ask if anything was missed, and briefly sum up what you heard. Then confirm next steps and incentive delivery. It also helps to remind participants that their feedback will be grouped with other responses and won't be used for marketing.
Send participant instructions and run a pilot session
Send a confirmation email as soon as the session is booked. Include the date, time, time zone, meeting link, duration, and a short description of the session.
Keep the tech instructions simple:
- join from a laptop or desktop if possible
- use headphones or earbuds
- sit in a quiet place
- close bandwidth-heavy apps before the call
You can also offer a 5- to 10-minute tech check for screen-sharing sessions or for participants who need extra setup help.
Before you run a live session, test the guide with a colleague. Go through the full flow at the pace of a real session and check the timing, question clarity, topic shifts, and any technical steps. If something creates confusion or awkward silence, fix it and test again. A pilot works like a preflight check for the remote session. It also helps the moderator get used to reading nonverbal cues over video, which takes more deliberate attention than it does in person. Once the guide is working, choose the tools and backup plan that fit it.
3. Choose tools, incentives, and backup plans
With the script and participant workflow in place, the next step is to lock down your tools, incentive, and backup plan.
Pick video, note-taking, and recording tools that support the session
Keep the setup simple: video, shared notes, and recording or transcription. That way, the moderator can stay focused on the participant instead of scrambling to write down every detail. When you pick tools, look for reliability, ease of use, and data protection so people can join without a hassle.
For many teams, a solid setup is Zoom, Microsoft Teams, or Google Meet paired with Google Docs, Notion, or another shared document, plus an AI notetaker or transcription tool. If your team already works inside Google Workspace or Microsoft 365, sticking with that system can cut down on setup for participants.
Before the first session, make sure any recording bot or transcription tool has permission to join the call. It also helps to keep a shared live notes doc open during the session so observers can log key points by question, theme, or timestamp as the conversation happens.
Once your setup is set, sort out payment details so recruitment doesn’t get messy.
Set incentives and communicate payment clearly
Match the incentive to the session length and the participant’s seniority. In every message, spell out the amount, payment method, and timing. For example, you might offer a $60 USD digital gift card or $100 USD via PayPal for a 60-minute session. Include any eligibility rules too, like needing to attend the full session and arrive on time.
Plan fallback options for internet, audio, and meeting link failures
Tech issues are going to happen. The point isn’t to avoid every problem. It’s to have a plan ready so one glitch doesn’t kill the session.
Nielsen Norman Group advises assuming problems will happen and planning for them rather than improvising during the call.
A few simple steps cover most of the common failures:
- Add phone dial-in. Put a telephone dial-in number and meeting ID in every calendar invite. If the internet drops, switch to phone and keep screen sharing. If audio breaks, use the phone line. If bandwidth is the problem, turn off cameras.
- Keep a backup meeting link. Set up a second link on a different platform and keep it ready in case the main one fails.
- Set a reschedule threshold. Decide on a rule before the study starts. For example, if audio can’t be fixed within 10 minutes, reschedule at the participant’s convenience and still pay the incentive.
Write all of this into your session checklist so every moderator handles problems the same way.
4. Set up your interview environment and protect participant trust
After your tools and backup plan are in place, the next step is the setting itself. The room, the people on the call, and the way you handle privacy all shape how relaxed and focused the participant feels.
Set up your space, audio, video, and screen-sharing before the call
Use a quiet, private room and close the door. If other people are nearby, let them know a confidential session is in progress. Set your camera at eye level and sit about 2–3 feet away so your head and shoulders are easy to see. Put a lamp or window in front of you, not behind you, so you don't end up as a dark silhouette. A wired Ethernet connection is more reliable than Wi-Fi. If you're on Wi-Fi, stay near the router and pause heavy downloads.
Right before the call, turn on Do Not Disturb on both your laptop and phone. Close tabs or apps that contain confidential data, and shut down unrelated browser tabs too. If you'll be sharing your screen, clean up your desktop and test the exact prototype or materials you'll use, not just the meeting platform. Also mute smart speakers. They can wake up at the worst time and pick up parts of the conversation.
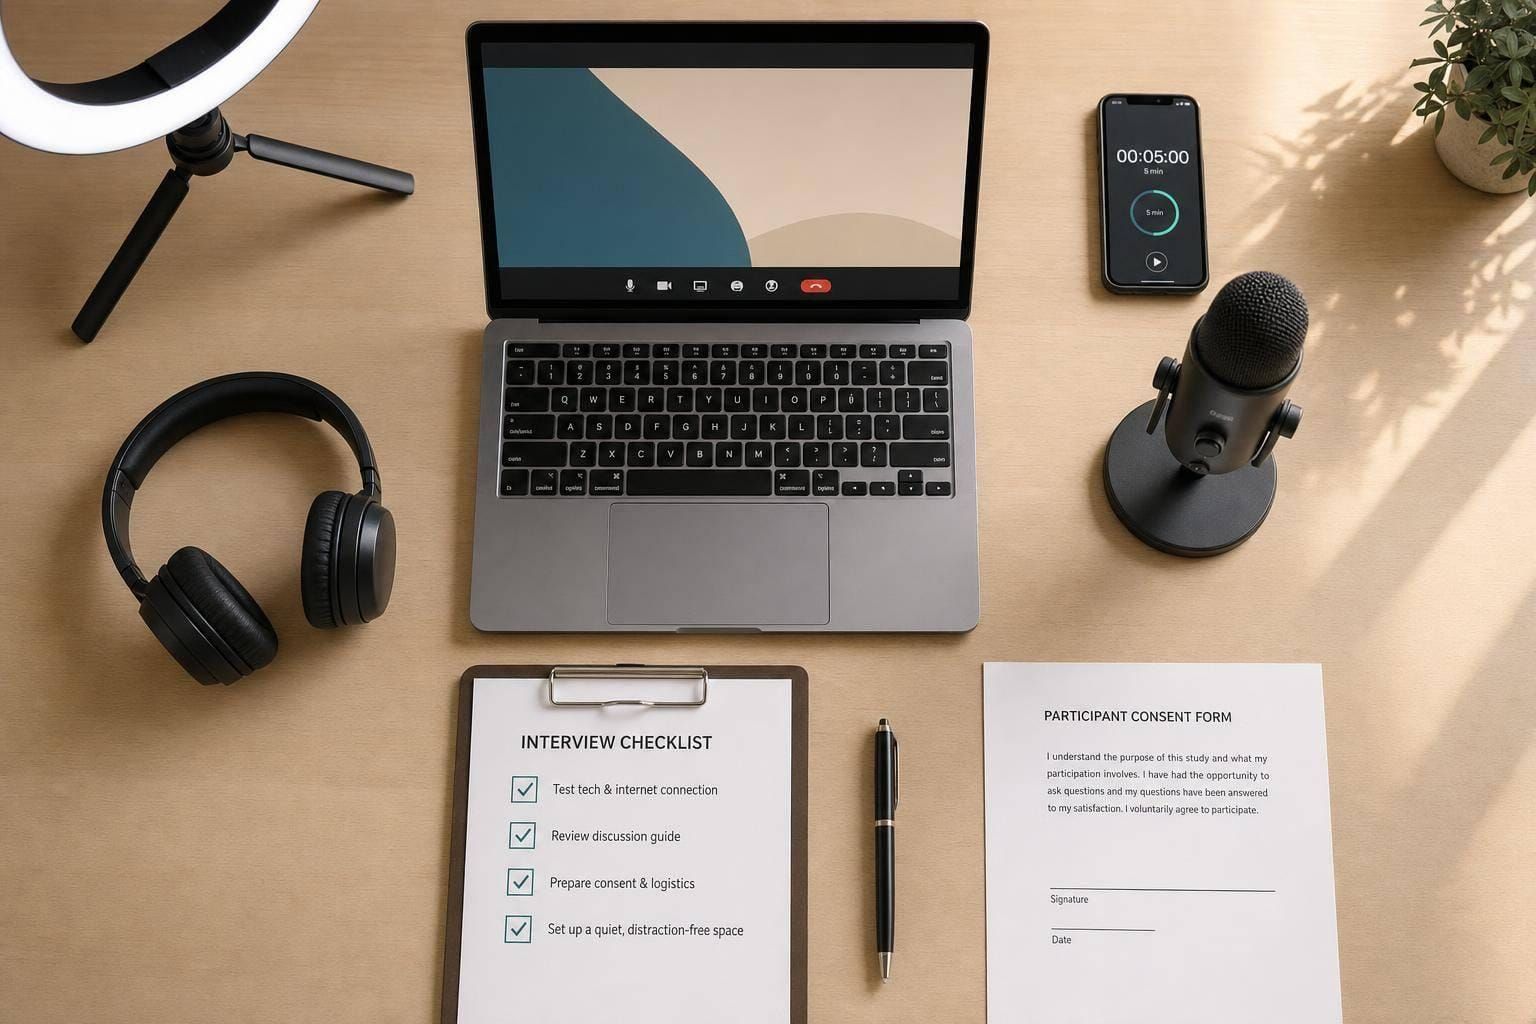
Use this checklist 10–15 minutes before the call, or save it as a shared team checklist:
| Check | Description | Done? |
|---|---|---|
| Room | Quiet, private, door closed | ☐ |
| Lighting | Main light source in front, no harsh backlight | ☐ |
| Camera | Eye level, head and shoulders visible | ☐ |
| Audio | Headset tested, no echo or background noise | ☐ |
| Internet | Wired or strong Wi-Fi, no heavy downloads running | ☐ |
| Notifications | Do Not Disturb on laptop and phone | ☐ |
| Screen | Desktop clean, unrelated tabs and apps closed | ☐ |
| Tools | Video platform, prototype, and notes doc open and tested | ☐ |
Once the setup is done, sort out roles before anyone joins.
Assign moderator, note-taker, and observer roles before the session
Set roles in advance and make them explicit. The moderator welcomes the participant, confirms consent and recording, guides the discussion using the script, manages time, and adjusts questions when needed. For most of the session, the moderator should stay focused on the participant. The note-taker stays muted and off-camera, recording detailed notes, quotes, behaviors, and timestamps in a structured template so the moderator can give the participant full attention.
Observers should join muted, give a brief introduction, then turn cameras off and stay out of the discussion unless the participant agrees to something else. If observers have questions, send them through a backchannel like a private chat in the video tool, a Slack thread, or comments in the shared notes doc. The moderator can decide whether to ask them in the moment or save them for the debrief. It also helps to tell observers ahead of time that they'll get 5–10 minutes at the end for clarifying questions. That small step cuts down on interruptions in the middle of the session.
If you're working alone, record with consent and keep a short notes template for behaviors, quotes, and pain points.
After roles are clear, take care of consent and storage before recording starts.
Handle consent, privacy, and data storage before recording begins
Before you press record, walk through a short consent script in plain language. Say what you're recording - audio, video, and screen - who will have access, how the recording will be used, and how long it will be stored. Then ask for verbal consent. If the participant says no, switch to manual notes.
Store recordings in a secure, access-controlled folder, not on a personal desktop or an open shared drive. Label files with participant IDs instead of names, such as P07 – Checkout flow. When you share findings with stakeholders, anonymize quotes by describing people in broad terms, like a small-business owner in the Midwest, instead of naming them. Set a deletion timeline too. For example, delete raw recordings in 6–12 months and anonymized notes in 12–24 months, then tell participants that timeline during consent.
Conclusion: A preparation checklist for better remote interviews
Remote interviews go well when the prep is done right: a clear goal, a tight script, ready participants, tools that work, and a setup you've tested before the call. In practice, that means defining the research objective, building a focused discussion guide, confirming participant fit, locking in your tools and backup plan, and checking your environment and consent process before the session begins. Miss just one piece and you can waste time for both sides.
Use the checklist below to catch problems you can avoid before the participant joins.
Key points to check before every session
Use this final checklist in the last 10–15 minutes before the participant joins:
| Item | Check |
|---|---|
| Research objective | Tied to a specific decision or hypothesis; shared with your team |
| Participant fit | Screened for role, experience, and behavior fit 24–48 hours before |
| Script, consent, and recording | Script reviewed; consent language ready; notes and recording ready |
| Calendar | Correct time zone, meeting link, duration, and contact method |
| Incentive details | Amount in USD, payment method (e.g., digital gift card, PayPal, or ACH), and delivery timeline confirmed |
| Tech check | Camera, microphone, screen sharing, and recording tool tested and working |
| Backup plan | Alternate link, dial-in number, and owner for troubleshooting |
FAQs
How do I choose between discovery and evaluative interviews?
Choose discovery interviews when you're still shaping your hypotheses and need to learn about user needs, behaviors, and main pain points.
Choose evaluative interviews when you already have an interface or concept and want feedback on clarity, usability, and how well it works. Put simply: discovery looks at motivations and frustrations, while evaluative checks the UX by watching people do tasks and then asking follow-up questions.
What should I do if a participant refuses to be recorded?
Respect their decision. Informed consent matters here, and participants can pull that consent at any time.
If recording isn't possible, use detailed notes in the moment instead. Have one person focus on note-taking so they can capture spoken feedback and nonverbal cues. And before you record anything, always confirm consent first.
How can I tell if I’ve interviewed enough participants?
Aim for 5 to 8 participants per user segment. That range usually gives you a good balance between cost and the chance of finding most usability issues.
Just as important, screen participants well so they match your target audience. If several people run into trouble with the same tasks, that’s a strong signal you’ve found issues worth fixing in the design.